I will show you step by step how to re root using a tweaked method called the "wet knot" method.
There are many tools out there to do re roots, fancy schmancy needles with handles, re root machines, etc., but my hands are big and I like the easy way out.
First you need a doll head, obviously.
If you want to practice, that's cool too, you can use any old head.
Many doll heads are made of soft plastic, they are so much simpler to re root than say a Fashion Royalty head, which is made of a harder plastic.
Not to fret!
Heat solves all problems with plastics!
Your first step is to remove the old hair.
I use a pair of scissors and cut all the hair off as closely to the head as possible.
If you just try to pull the hair out as is, it will tear in pieces rather than in the plugs of which it was first placed by the manufacturer.
I run hot water over the now cut down hair head (remember, heat expands plastic) to open the holes a bit. Pull out the hair piece by piece with a pair of needle-nosed pliers.
It works great!
You will need to go up through the neck hole a few times with tweezers to pull out any residual hair.
Rinse the head and use a magnifier if you have one to be sure you removed all the hair.
If not, when you re root, you might "catch" the old plug on the needle and it will ruin the new hair.
Now you're ready to re root!
Here's what you will need;

- Doll Head
- Doll Hair
- Scissors
- Needle-nosed Pliers
- Long thin (2 inch is good) needle
- Hard Eraser
- Brush
- Hair Clip
- Very Warm Water
- Cool Water
They have lots of colors and are FAST to ship.
The other doll hair place, in my opinion, is for the birds and birds don't have hair!
Nor do they many times.
Most doll hair comes from Japan, so brands are basically the same no matter who you use.
I generally use about 15 strands or so for one plug.

Depending on the length you want and different manufacturers, you might need to cut the long hair plug in half thus giving you two plugs to root.
The hank of hair bought can be cut first or after you choose the 15 hairs.
You can also mix colors at this point as well.
I first put my doll head in very warm water to soften up the plastic. Some people use a heating pad. I'm not into being electricuted and please don't use a microwave. The Kingsford Charcoal Ken doll wouldn't sell very well.

I then wet the strand with cool water (it makes it soooo much easier!) and snip off a little hair at each end to make it very even.

Re-wetting the tip of the hair helps.

Next choose a place to start. I often start from the back of the head and root towards the front. This way the hair isn't falling naturally into your work.
When doing a mohawk, I always start at the front to get a better alignment view.
Choose the old hole or you can make a new one with a push pin.
Push the needle gently through the head towards the neck hole.
It sometimes goes through easily, sometimes not.
The "not" times I use a very hard thick eraser to push through the head and can then manipulate the needle towards the neck hole.

While pulling, you will see the loop of hair at the neck hole and two single strands will pop up on top of the head.


This will pull the hair and needle out of the neck hole and the needle will slip nicely off the hair!

At this point I re-wet the hair coming from the neck hole. It makes it easier and keeps the hair from frizzing when pulling back up into the neck.
Now it's time to tie a knot in the hair coming from the neck hole. Be careful not to pull the hair down too much or you will have to start over.

After the knot is tied tight, snip off the excess hair but not too close to the knot, or the knot could come undone.

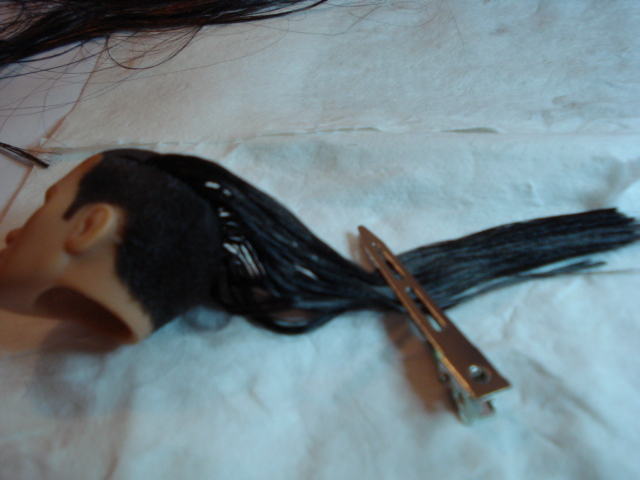
Pull the hair from the top of the scalp upwards until you meet resistance.
Don't pull too hard on a warm doll head or it could come right through.
Secure the hair with a clip and you have just re-rooted!!
Well, one piece anyway ; )

Hope you enjoyed!
Wow John, It sure takes alot of work to make your dolls beautiful. Keep up the good work, it's fantastic!!!
ReplyDeleteHi! This is by-far the best tutorial for re-rooting I've found; the whole "no need to buy weird specialty tools" thing really rocks. :) I've already rooted two dolls with this method and they turned out great. :)
ReplyDeleteHi Tina! Thanks so much. It's nice to know my tutorial is appreciated. Happy rooting!!!
Delete